Please read this documentation completely before continuing. The software packages may ask you to disable your anti-virus software during installation -- you will not be protected from viruses in such situation. Use this document at your own risk. IIT disclaims any liability for any actions or results of the following this documentation.
Since network failure may interrupt your operation, please save your data often.
I. Overview
II. Remote Access to ECE Unix Network
III. Git Repository Setup
IV. VS Code and Git Work Flow
Welcome to ECE449 and ECE 590!
This document presents a guide to the tools that are essential for our software development process. As we focus on the system and the work flow that utilize these tools to complete our projects, it is necessary for you to follow the links provided to learn more about them in order to work more effectively in this course and in future.
Please be advised that this is a long document but you have to read and follow it word-by-word to survive the course. Failure to do so may lead to ZERO for your project grades, especially for the emphasized paragraphs like this one.We follow the current industrial practice to utilize software development tools and process that integrate well with the Linux operating system (OS). To save your time setting up such a system by yourself, we provide a virtual machine (VM) containing a full-featured Linux installation with all the necessary tools that can run on most OSes. Moreover, the ECE Unix network is used to provides access to a Git-based code repository as the interface to our continuous integration (CI) system that builds and tests your code automatically.
That said, you will need to get familiar with Linux and Git at the beginning of the course. Here are the tutorials you should read and follow. You will NOT survive the course if you are not familiar with these tools.
Please be advised that to run software development tools smoothly in general (and in particular our VM) will require you to use a reasonably powerful computer (desktop or laptop). Please make sure your computer is able to run VirtualBox. We strongly recommend a recent computer with solid-state drive(s) as well as at least 16GB of memory and 4 physical processor cores. You may need to adjust our VM setting if your configuration does not meet the recommended one.
Feel free to email us any question you may have. You may also find resources online to help you, in particular from Stack Overflow and YouTube after searching from Google etc. A recommend way to learn is to follow the next few sections to access either the VM or the ECE Unix network and to practice them there.
As a summary of the whole document, here are the most important hints.
To use our VM, first install the most recent version of VirtualBox on your computer. You will need to turn on hardware virtualization if you haven't done so already.
Download our VM Appliance IIT-ECE449.ova and double-click to install/import. Verify the integrity if possible. Note that all these steps may take a while to finish so please be patient.
Start the VM. After a while, it will display the login screen. Login here to access the graphical user interface (GUI) below using username 'ubuntu' and password 'ece449'.
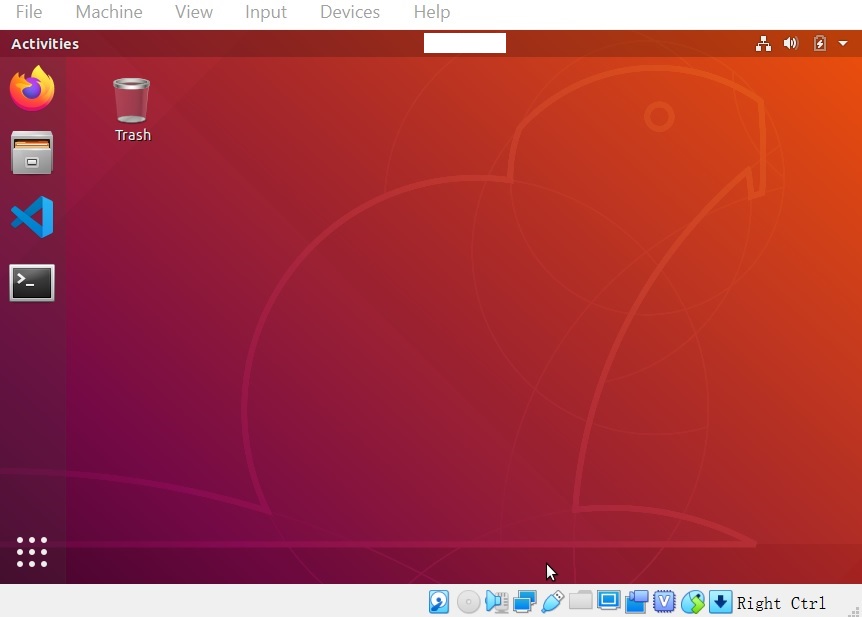
The GUI should be intuitive to use. In particular, the four large icons on the left allow a quick access to the four mostly used applications for this course -- web browser, file browser, VS Code, and terminal. If the GUI locks itself by displaying a clock, you may simply press any key to unlock it.
If by any chance the VM stops to work in future, you may install/import the VM again and follow the next few subsections to setup central and local Git repositories. You'll be able to recover all the code you have pushed to the central Git repository, though all the code you have NOT pushed to the central Git repository will be lost. Therefore it is very important for you to read and follow Section IV.B Git Work Flow.
B. Connect to IIT VPNIn order to access the ECE Unix Network from outside of the IIT campus, you will need to connect to IIT VPN first. Please first familiarize yourself with IIT VPN/Remote Access Procedure and Policy.
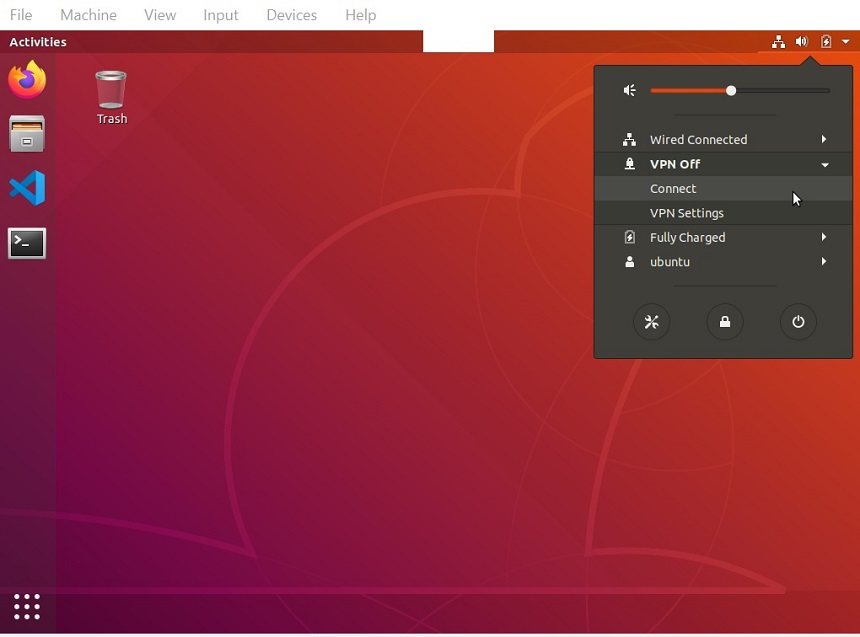
Click the top-right corner of the VM to bring up the system tray. VPN is currently off as indicated. Click "Connect" under "VPN Off".
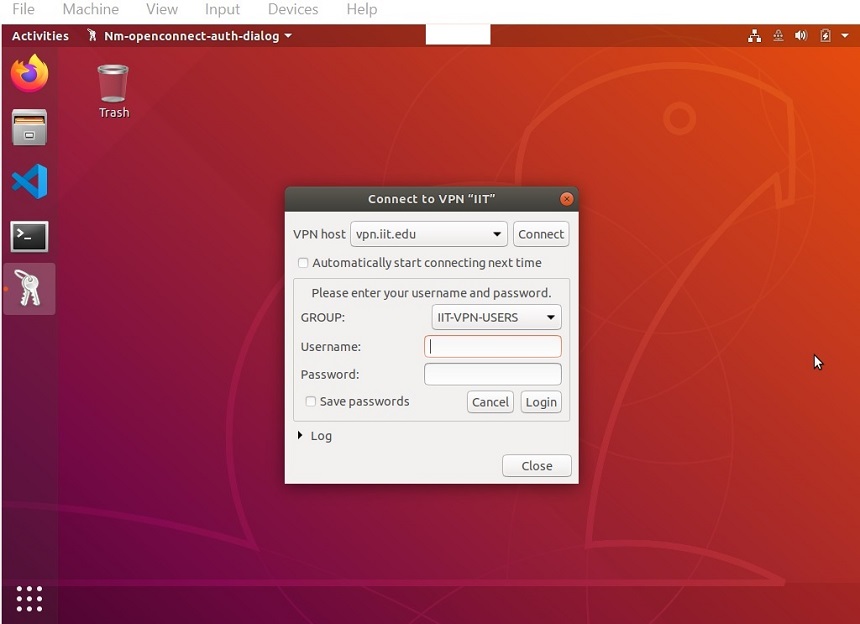
Now you should be able to see the login dialog box. Click the "Connect" button to connect to "vpn.iit.edu". Make sure the GROUP is IIT-VPN-USERS. Input your IIT username and password and then click the "Login" button. This is your IIT account to access your IIT email, myIIT, Blackboard, etc. Do not use your ECE account here.
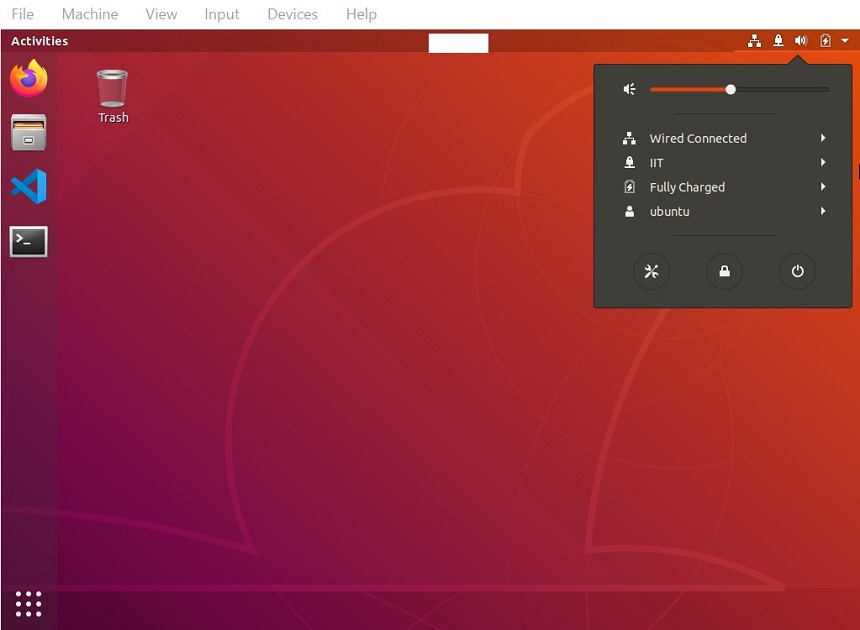
After a while, the IIT VPN should be connected as confirmed from the system tray.
Your ECE account, which is different than your IIT account, will be created at the beginning of the semester for you to access the ECE Unix Network. Your ECE account information including your ECE username and password will be sent to you via a separated email.
Once you have received the email containing your ECE account information, you may access the ECE Unix Network to work on your project from our provided VM assuming Internet connection is available.
Make sure the IIT VPN is connected. Open a terminal window and execute the command ssh username@uranus.ece.iit.edu from there. Answer "yes" when asked to verify RSA key fingerprint. Wait a while until it prompts you for your password. Type your password and then hit enter ("*" will not be displayed). Don't forget to use your ECE username instead of mine.
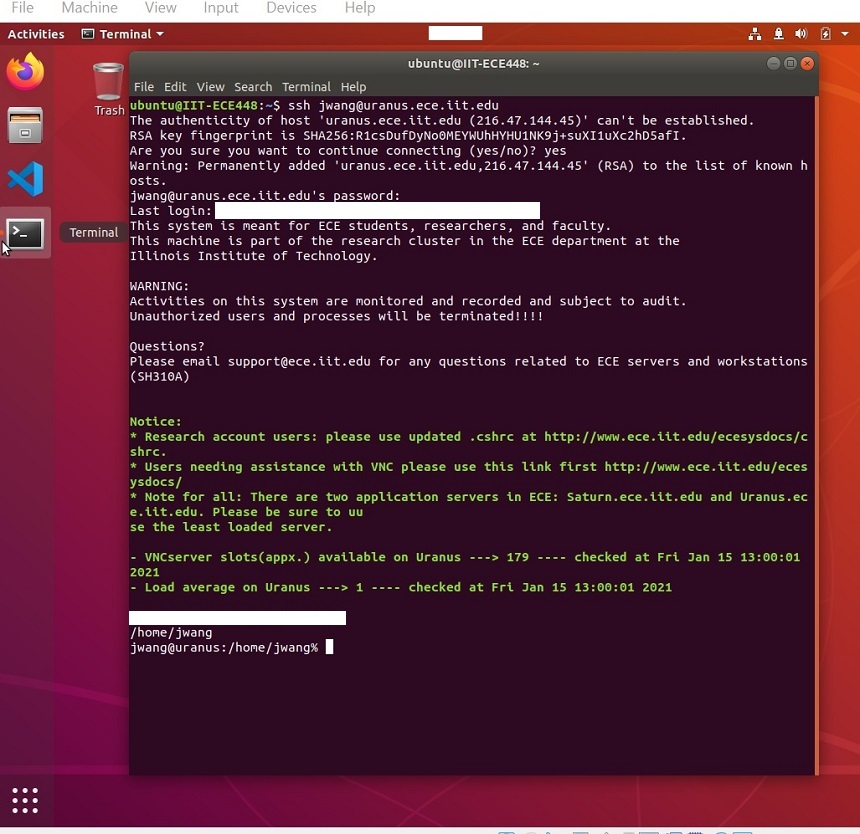
You are now connected to uranus and are able to execute commands. The very first command you should execute is passwd that allows you to reset your ECE password.
jwang@uranus:/home/jwang% passwd
Changing password for user jwang.
Enter login(LDAP) password:
All your source code should go to our central Git repository at the end of the day. This practice provides a lot of benefits while requiring a minimum effort from you, some being listed below,
For security reasons, although our central Git repository is also located within the ECE Unix Network, it relies on public key infrastructure (PKI) for authentication and authorization. A pair of public/private keys need to be created for use in our central Git repository.
Click the web browser icon in our VM GUI to start the web browser and open this page. Right click setup_ece449_uranus and choose 'Save Link As...' to save it to your home directory. Click the terminal icon in our VM GUI to start a terminal. You should be in your home directory. Use chmod +x setup_ece449_uranus to mark the file as executable, and then use ls -l setup_ece449_uranus to make sure the command to setup the keys exist.
ubuntu@IIT-ECE449:~$ chmod +x setup_ece449_uranus
ubuntu@IIT-ECE449:~$ ls -l setup_ece449_uranus
-rwxrwxr-x 1 ubuntu ubuntu   387 Aug 12 00:25 setup_ece449_uranus
Make sure the IIT VPN is connected. Now, execute setup_ece449_uranus with your ECE account name. Wait a while and input the password of your ECE account when prompted.
ubuntu@IIT-ECE449:~$ ./setup_ece449_uranus jwang
Generating public/private rsa key pair.
Your identification has been saved in /home/ubuntu/.ssh/id_rsa.
Your public key has been saved in /home/ubuntu/.ssh/id_rsa.pub.
The key fingerprint is:
******** jwang@ece449
jwang@uranus.ece.iit.edu's password:
Locating record for jwang ...
Receiving key for jwang ...
ssh-rsa ********
Updating system for jwang ...
Your key jwang.pub has been updated.
Initialize repository for jwang ...
You may clone your repository as below now.
  git clone ece449@uranus.ece.iit.edu:jwang my449
You might see a slightly different output as I have hidden my key and the command may take a while to complete.
Here are a few notes regarding your keys.
Git is a distributed version control system where a repository is mirrored locally in addition to being stored on a server, i.e. in our central Git repository. Therefore, it is necessary for you to setup your local Git repository before you can work on the projects. As we would also like to provide you with an initial project package containing useful files, we request you to setup your local Git repository by cloning from our central Git repository.
As you may have noticed at the end of the previous subsection, the command to be used is git clone ece448@uranus.ece.iit.edu:username iot_ece448. Make sure the IIT VPN is connected.
ubuntu@IIT-ECE449:~$ git clone ece449@uranus.ece.iit.edu:jwang my449
Cloning into 'my449'...
remote: Counting objects: 50, done.
remote: Compressing objects: 100% (43/43), done.
remote: Total 50 (delta 5), reused 0 (delta 0)
Receiving objects: 100% (50/50), 16.83 KiB | 957.00 KiB/s, done.
Resolving deltas: 100% (5/5), done.
!!!!STOP TYPING ANY PASSWORD!!!! if you were asked for password of ece449@uranus.ece.iit.edu as shown below, otherwise our servers may block your access for a few hours.
ubuntu@IIT-ECE449:~$ git clone ece448@uranus.ece.iit.edu:jwang my449
Cloning into 'my449'...
ece449@uranus.ece.iit.edu's password:
If you haven't forgotten to replace my username 'jwang' with yours, this simply means your Key Setup fails. Please repeat Section III.B Key Setup for Central Git Repository first and try to clone again. If you are still asked for the password, contact the course instructor for help.
You can then verify that you actually got something from our central Git repository.
ubuntu@IIT-ECE449:~$ cd my449
ubuntu@IIT-ECE449:~/my449$ ls
easynn_cpp.py     ece449.code-workspace  grade_p4.py       mnist_test.npz
easynn_golden.py  grade_p1.py            grade.py          msimple_params.npz
easynn.py         grade_p2.py            Makefile          prj01.py
easynn_test.cpp   grade_p3.py            mnist_params.npz  src/
Here are a few notes regarding the cloning.
Visual Studio Code (VS Code) is a code editor that can be extended into a powerful IDE by third-party extensions. Our VM comes with VS Code and necessary extensions to support Python and C++ development and please feel free to add other extensions to support your development.
Start VS Code. After a while, from the menu click 'File' and then 'Open Workspace...'. Then navigate to the directory 'my449' and select 'ece449.code-workspace' to open our project workspace. Once the workspace opens, find and open the Python file 'prj01.py' from the left panel. This is the only file that you will need to modify for Project 1.
If you prefer to use terminals within VS Code instead of as GUI applications, you may do so by clicking 'Terminal' and then 'New Terminal' from the menu.
B. Git Work FlowA work flow is a series of steps that you follow to complete certain task. As those steps may need to be executed at different frequencies and be combined differently for various stages of that task, it is essential that you don't just follow them blindly - try to understand their purposes in order to use them more effectively. If there is any issue, it is important for you to read the output messages carefully and to follow their instructions when possible.
Here is a typical Git work flow that you can iterate multiple times a day.
Before you begin to work on your local repository everyday, you should pull changes from our central Git repository. This is necessary as we may update our central Git repository occasionally. To pull the changes, make sure the IIT VPN is connected and use the command git pull. Depending on whether there is any change, your output message could be different.
ubuntu@IIT-ECE449:~/my449$ git pull
Already up to date.
Now, you probably have figured out how to solve the questions in 'prj01.py'. For example, you may change line 11 into 'return a+b'. To test if your change is correct, run python3 grade_p1.py.
ubuntu@IIT-ECE449:~/my449$ python3 grade_p1.py
...................................
Local Testing: 1 functions passed
*************************************************************
* You may receive 0 points unless your code tests correctly *
* in CI System. Please commit and push your code to start.  *
*************************************************************
You may use 'less' in the command like python3 grade_p1.py|less to read the detailed output. Indeed, the change is correct and the test case 'Q2' is passed.
Our CI system will use the same set of test cases to test your project for grading purpose. However, as emphasized in the above output, any tests you run in your own VM, passed or not, do NOT count towards your project grades. In other words, we will only use the grading reports from our CI system to decide your project grades. You will need to commit and push your code to the CI system as described later to start the grading process there.
It is a good time to commit changes locally and to push them to the central Git repository whenever you feel tired and decide to work on your project on another day, no matter whether all test cases are passed or not.
The Git system may ask you to setup your name and email if you haven't done so already, which is very useful when multiple people need to work on the same repository. You can setup them by git config.
ubuntu@IIT-ECE449:~/my449$ git config --global user.name "Jia Wang"
ubuntu@IIT-ECE449:~/my449$ git config --global user.email jwang34@iit.edu
If there is any newly added files, it is necessary for you to notify Git of any by git add. Otherwise, Git can track the modification to a file that is already in the repository, and you should save the changes to your local repository by git commit -am so that different revisions of the same file, i.e. its history, can be recorded.
ubuntu@IIT-ECE449:~/my449$ git commit -am "Q2 passed"
[master 3e97106] Q2 passed
 1 file changed, 1 insertion(+)
Don't forget to include a brief message with the commit, e.g. "Q2 passed" in my example, so that later on you can easily recognize what the commit is about.
Please make sure all changes have been added and committed by git status before proceeding to the next step.
ubuntu@IIT-ECE449:~/my449$ git status
On branch master
Your branch is ahead of 'origin/master' by 1 commits.
  (use "git push" to publish your local commits)

nothing to commit, working tree clean
Send your changes to the central Git repository by git push. Make sure the IIT VPN is connected.
ubuntu@IIT-ECE449:~/my449$ git push
Counting objects: 8, done.
Delta compression using up to 4 threads.
Compressing objects: 100% (7/7), done.
Writing objects: 100% (8/8), 601 bytes | 150.00 KiB/s, done.
Total 8 (delta 4), reused 0 (delta 0)
remote: ========================================
remote: Submission has been received for jwang.
remote: Project grade_p1: testing request has been sent for jwang.
remote: ========================================
To uranus.ece.iit.edu:jwang
   a72245d..3e97106  master -> master
It is very important for you to commit and push your changes at least once at the end of the day no matter how you feel about your progress during the day and no matter whether your project builds and tests successfully or not. This will save you a lot of work if something bad happens and will help us to understand your progress to assist you better.
C. Using the Continuous Integration SystemA continuous integration (CI) system automatically builds and tests projects in a production environment to ensure rapid deployment. As indicated by the output lines starting with 'remote:' from git push, our CI system kicks in as soon as you push your changes to our central Git repository. It is important for you to carefully read those lines as they serve as a receipt of your project submission.
Our CI system first acknowledges you that your project submission has being received and then requests tests for grading.
remote: ========================================
remote: Submission has been received for jwang.
remote: Project grade_p1: testing request has been sent for jwang.
remote: ========================================
It takes a while, usually a few minutes, for our CI system to test and grade your submission automatically. To view the latest grading report, you need to access the ECE Unix Network (make sure the IIT VPN is connected) and execute the command /home/ece449/show there.
jwang@uranus:/home/jwang% /home/ece449/show
Wed Aug 12 19:25:12 UTC 2020
............................
CI System: 1 functions passed
@name p1, passed 1
As expected, 1 test case is passed for Project 1 in our CI system.
Pay attention to the date/time reported. Since many of us are taking the course from home and not in the same timezone as Chicago, please translate this time to your local timezone first. If they are well before the last time you pushed, then our CI system is still working on grading your latest submission (and submissions from other students). Execute the command /home/ece449/show after 5 minutes and repeat if necessary.
Overall, you should start working on your project WELL before the deadline and make full use of our CI system to avoid any surprise in your project grades. Unless you have difficulties to access the grading reports or to understand the details, we will simply direct you to read your own grading reports if you have any doubt regarding your project grades. It is your responsibility to check your grading reports and to correct any errors BEFORE the deadlines. It is quite possible for all test cases to pass in your VM but for some or all of them to fail in our CI system. Failure to check your grading reports on a timely manner may result in VERY LOW project grades, and is NOT an excuse for late project submissions.